DropGrid®
Understanding DropGrid
DropGrid® is a revolutionary tool developed by OneVizion® to reduce the cost of on-boarding new data by a factor of 10 or more.
The major DropGrid assumptions are:
- the data is a rectangular block (i.e. Excel spreadsheet, access data table, csv file or similar type of data)
- the spreadsheet contains the values to build the configuration in OneVizion that the data is imported into.
The DropGrid session can create the following configuration elements:
- create or use existing Trackor®
- create new fields based on the headers of the Excel first row
- create a default tab layout based on the order of the columns in the Excel Spreadsheet
- create an Import based on the spreadsheet
- create a Report based on the spreadsheet
- create menu access items
- create a Trackor View that uses the order of the spreadsheet columns
- if latitude and longitude fields are detected create a fully configured google map and/or a google public map.
All of these configurations are created in minutes – not hours and days:
- Quickly upload spreadsheets into a Web environment without disrupting the end user
- The end user has data that is managed (different columns can be selected and saved), all data changes are audited, and the data shared by multiple users
- Spreadsheet data is available to be simultaneously viewed and updated by authorized stakeholders
- Robust and flexible security model supports user security roles that allow very granular control of access to data as well as system features
- Data is backed up on secure cloud storage
- Access to data can be extended to authorized third-parties (i.e., customers, suppliers, subcontractors, etc.) outside of the corporate firewall without having to give them access to the corporate network
- Access and changes to data is logged and fully auditable
- Ability to quickly create and share filters as well as grid and tab views in support of business specific requirements
Other DropGrid features include:
- Delete every feature added from list mentioned above
- Adding the Excel data into an existing Trackor and populating a combination of existing and added fields
- Linking parent Trackors (add a link) by using one of the Excel columns
This process collapses a multiple hour configuration session to minutes.
Setting Up the Trackor
To set up a Trackor users will need to have an existing Excel spreadsheet with column headings and any data that needs to be included.
Creating the Import
Click on the Add button,  in order to add a spreadsheet to the DropGrid. The applet below will open and user will be prompted to Choose the File to import into DropGrid.
Importing Data to the DropGrid
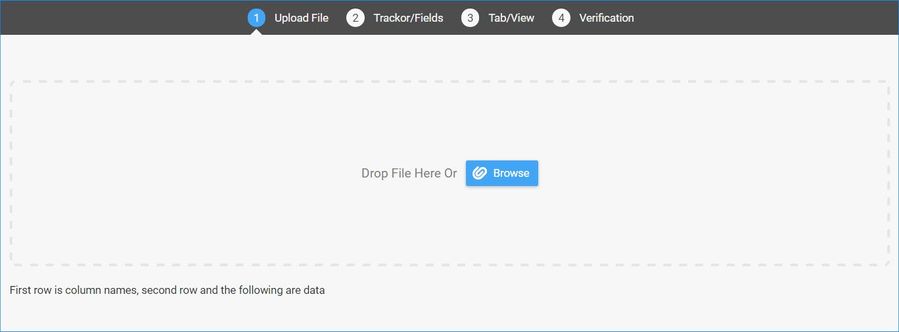
Once the file is chosen the following screen will appear. This allows the user to choose whether to create the entire trackor, or create the configuration only.
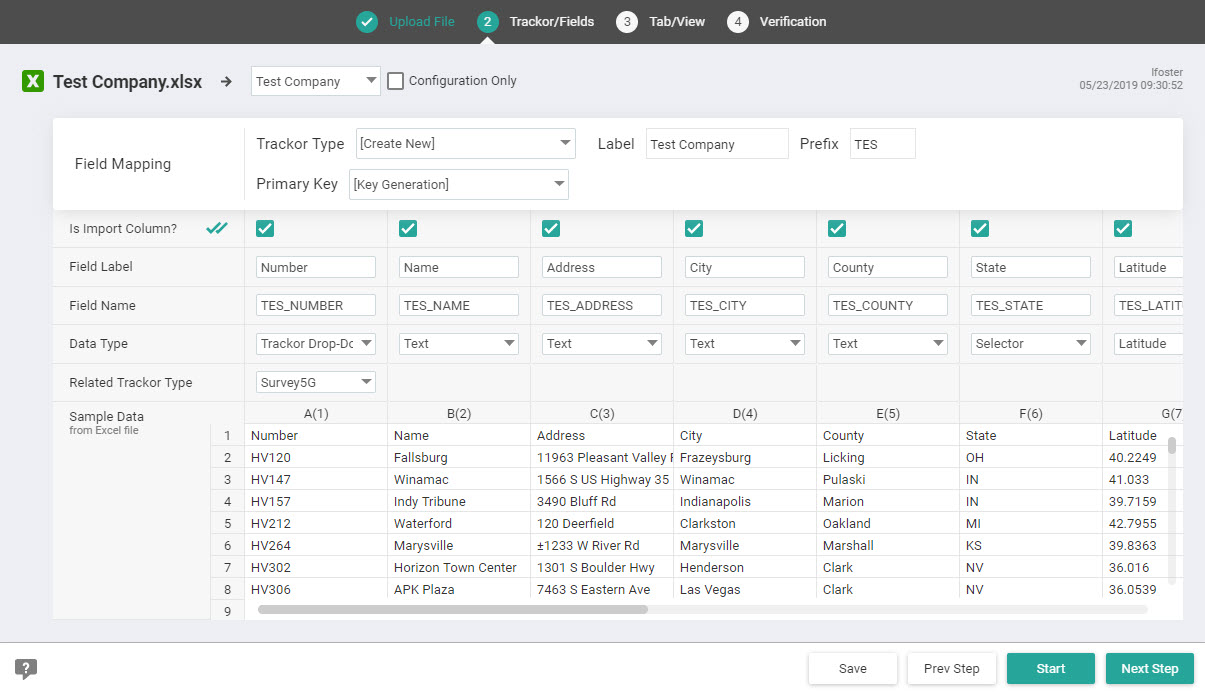
Users are not able to name fields with duplicate names.

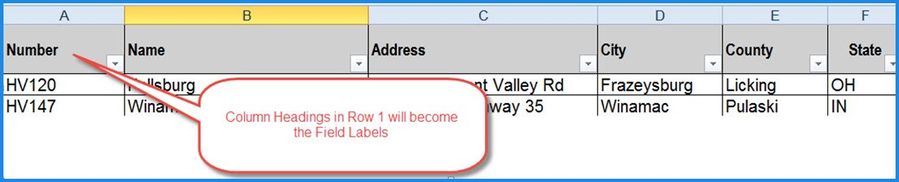
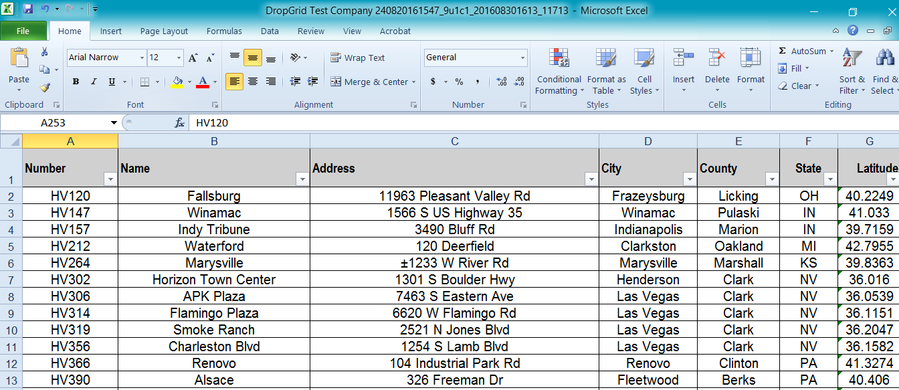
First, determine which Fields to create in the DropGrid. The Column Headings will become the Field Labels in OneVizion. An example is shown below.
It is important to make sure the data in the spreadsheet is consistent, meaning that the data in the columns match the appropriate data type. For instance, a date column has only dates, number columns has only numbers, etc… If a specific comment is required in a field and the data type for the field is not text, DropGrid will import this as a comment attached to that field, but not a value within itself.
Trackor Fields
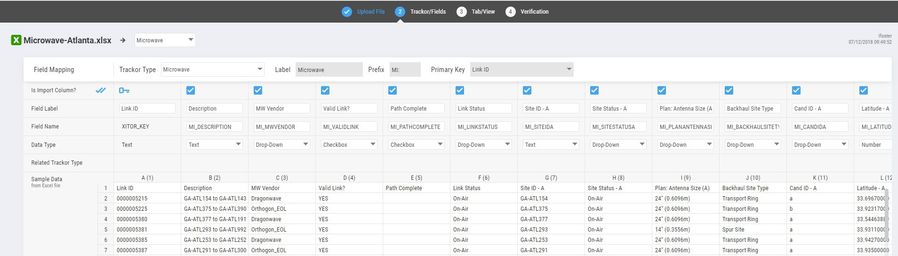
| Field Name | Field Description |
| Trackor Type | Allows the user to attach to an existing Trackor Type, or create a new Trackor Type. (Determine if you want to create a new trackor type or use existing.) |
| Label | Label Type that the fields will be given in the OneVizion database. |
| Prefix | Prefix that will be used with each field on the Trackor®. |
| Primary Key | Used to track items to prevent duplication. |
| Is Import Column | Checkbox selection Y or N to import. If user select the double check-marks all fields will be imported. |
| Field Labels | These will appear as the column heading on the excel spreadsheet. |
| Field Name | Name that the fields will be given in the OneVizion database. |
| Data Type | Use dropdown to choose what type of data should appear. ie…text, number, dropdown, etc… (If the type is drop-down, it will create V-table and load in all choices from spreadsheet) |
| Related Trackor Type | Ability to assign a parent Trackor Type |
| Sample Data | Shows example of how the grid will be arranged. |
Tab View
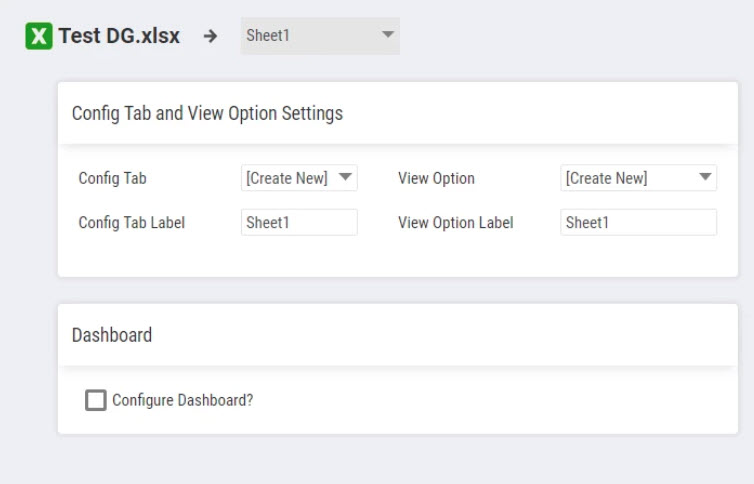
| Config Tab | Allows the user to create a configured tab to be associated with the current Trackor, attach to an existing Trackor, or Do Not Modify a Trackor. |
| Config Tab Label | Used to assign a label for the Config Tab. |
| View Option | Allows the user to create a Global View Option. |
| View Option Label | Used to assign a label for the View Option. |
| Dashboard | Users may choose to have DropGrid build a Dashboard based on the data in the Trackor. |
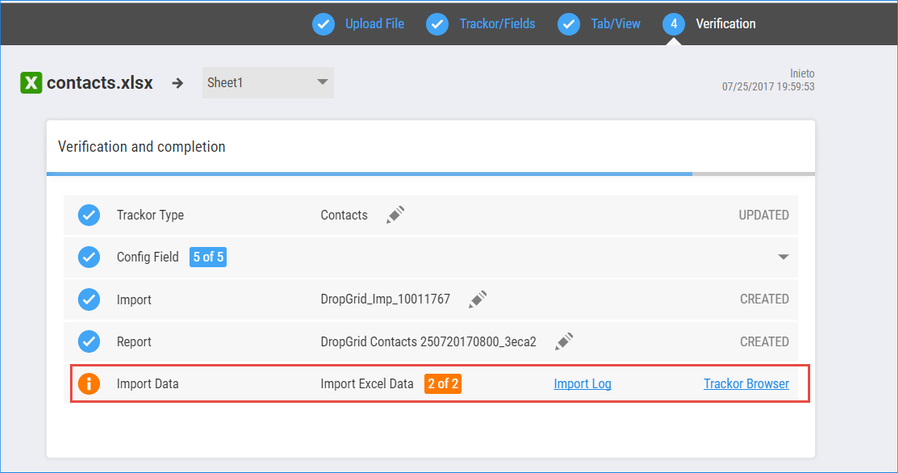
Verification
The last step will ask for verification and complete building the Trackor.
.jpg?version=1&modificationDate=1517846072267&cacheVersion=1&api=v2&width=800&height=383)
Import Data Status
The grid column labeled “Import Data Status” will alert user to any warnings that occurred during import.
Executed With Warnings
There are 2 ways to investigate errors that occur during the import.
Viewing Import Errors (Import Log link)
1- Click on the highlighted link, and then click on Import Log link.
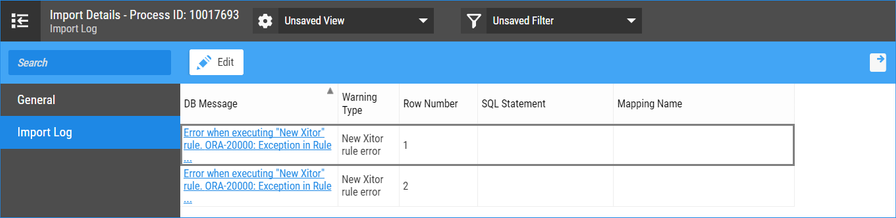
To correct the error, return to the Grid view. Update the field directly on the grid while this applet is open. Once changes are made click on the Save icon  .
.
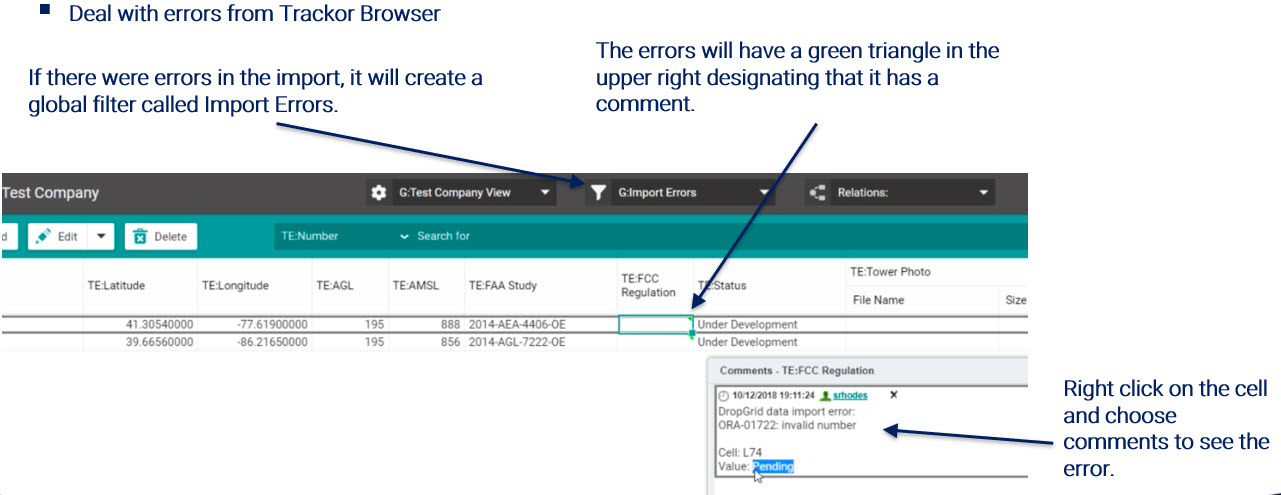
Viewing Import Errors (Trackor Browser link)
2- Click on the highlighted link, and then click on Trackor Browser link. This will redirect to the Trackor Browser. Correct any errors directly onto the Grid. Use the Save icon , to save all changes med to the Grid.
Managing Reports with DropGrid
Reports are automatically set up in the Reports application when a new DropGrid Trackor is created.
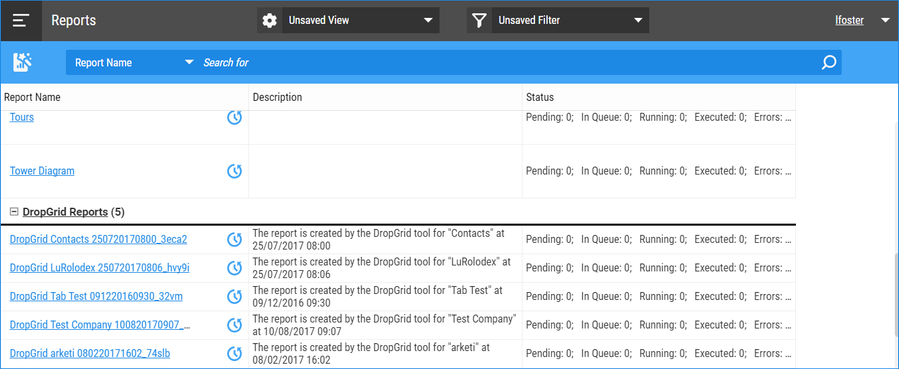
In order to run a report, select the blue link. An applet will open to allow preferences such as scheduling and notifications. Click OK to begin the report creation.
Click on the Report History Icon ![]() for status of the report. The applet below will appear with status information. Once the screen is refreshed the report shows “Executed” as shown in the example below.
for status of the report. The applet below will appear with status information. Once the screen is refreshed the report shows “Executed” as shown in the example below.

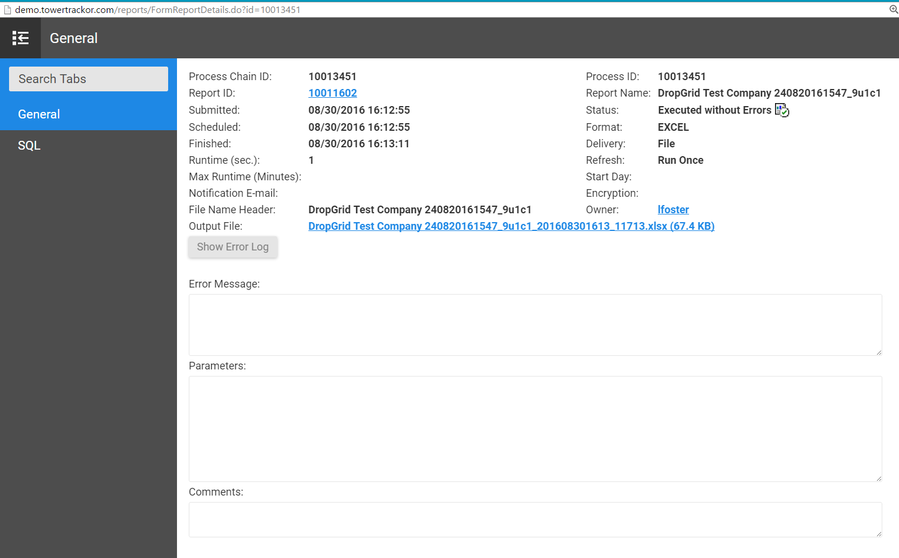
To view the Report Log click on the Report ID. The Report Log contains information regarding the run time and Report ID. An example is shown below.
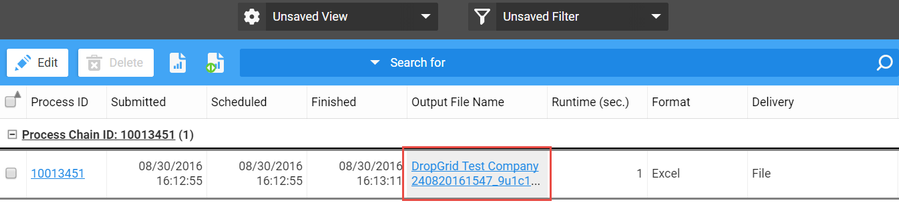
To download the Excel report click on the link of the Output File Name. An example is shown below.
Once the file is downloaded, click on the image to open in Excel.
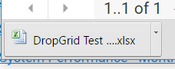
The Excel file will open as shown below.
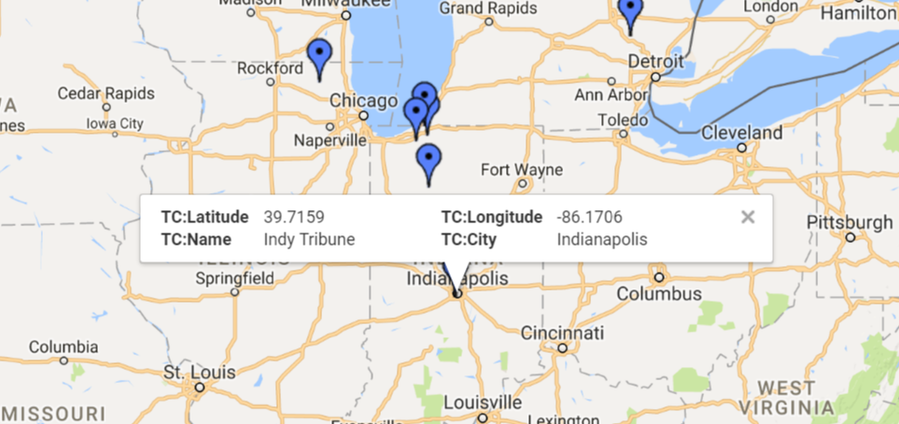
Mapping Trackors
DropGrid will automatically create a Mapping Trackor within the DropGrid Trackor Menu Group. Select fields for longitude and latitude to add a Mapping Trackor. To add a Public Mapping Trackor select fields for longitude, latitude, and check the Public Map check box.
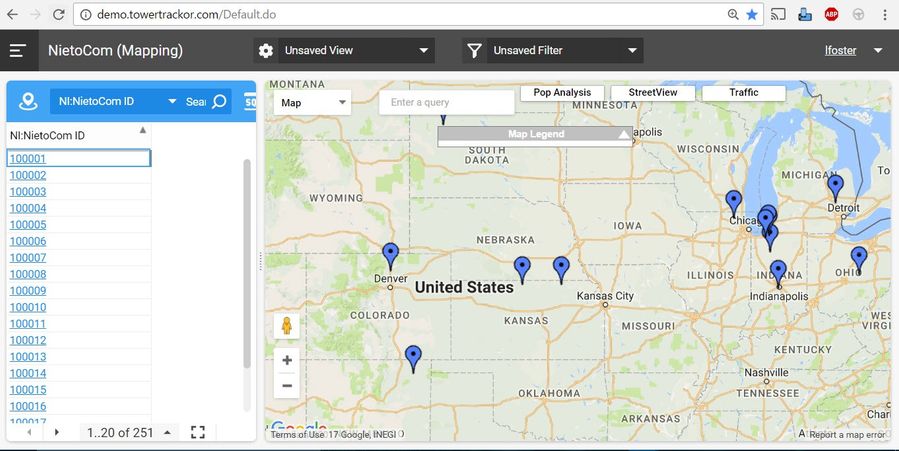
An example of the Mapping is shown below. In order to see information within the bubble, View Options must be set up based on the type of information the user would like to see.
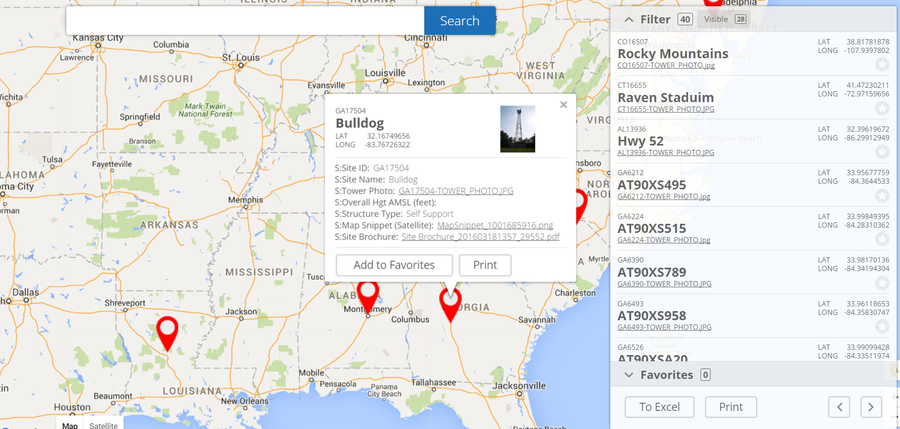
A Public Map is a link which can be shared internally or externally with individuals who may not be users of the OneVizion system. An example of a Public Map is shown below.
Editing a Grid
To edit a Grid highlight it in the application grid and click the Details/Edit icon,  . The Edit applet contains the same tabs and fields as the Add Configured Field applet.
Deleting a Grid
To delete a Grid highlight it in the application grid and clicking the Delete icon,  . Deleting a field permanently removes it from the system.
Deleting All Related Objects
To delete a all related objects highlight it in the application grid and click the Delete All Related Object icon, ![]() .
.
By selecting this all the imported data, fields and associated Trackors will be removed.
Export DropGrid Listing
To export click on the Export Icon, ![]() . For detailed instruction on Exporting refer to the Exporting Trackor Record Data documentation.
. For detailed instruction on Exporting refer to the Exporting Trackor Record Data documentation.
Copyright 2003-2020 OneVizion, Inc. All rights reserved